What Happens During a Professional Ceramic Coating Installation?
September 6, 2026
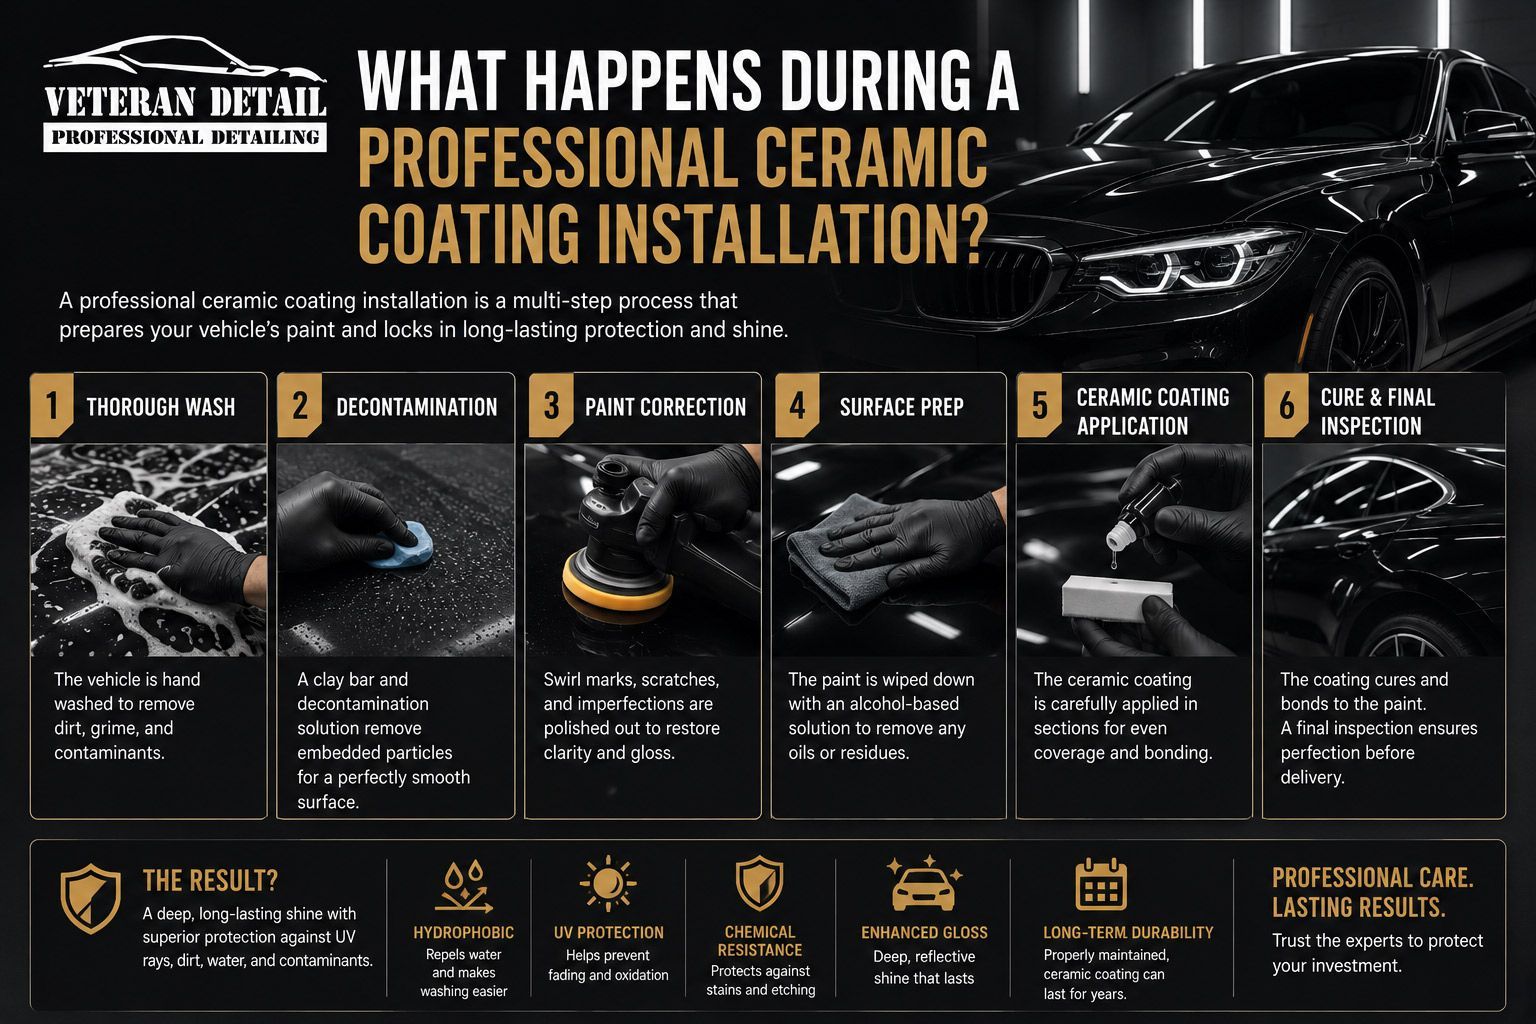
Most people know ceramic coating makes paint look great and repel water. Fewer people know what actually happens between dropping off the vehicle and picking it up two days later. Understanding the installation process matters because it explains why professional ceramic coating costs what it does, why it performs better than consumer alternatives, and why cutting corners at any step compromises the result. Here is a complete walkthrough of a professional ceramic coating installation.
Why Process Is Everything in Ceramic Coating
Ceramic coating is a chemistry-dependent product. It bonds to paint through a molecular reaction that requires the paint surface to be clean, corrected, and free of contamination at a microscopic level. Any contamination, imperfection, or environmental interference during application or curing disrupts that bond—and a compromised bond means the coating won't perform at its rated hardness, durability, or hydrophobic level.
This is why the installation process is as important as the product itself. Two shops using the same coating product can produce dramatically different results based entirely on how thoroughly they execute the preparation steps. At Veteran Detail in American Fork, UT, every coating installation follows a controlled process because the process determines the outcome.
Step-by-Step: The Professional Ceramic Coating Process
A professional ceramic coating installation follows a sequence of distinct stages. Each stage builds on the one before it, and skipping or shortcutting any step degrades the final result.
The following steps represent a professional-grade installation process:
- Initial vehicle inspection — the vehicle is examined panel by panel to document existing paint condition, note chips, scratches, swirl marks, and contamination. This inspection determines what preparation steps are needed and informs the customer before work begins.
- Exterior wash — a thorough multi-stage wash removes surface dirt, grime, and loose contamination. This is not a standard car wash. It typically includes a pre-rinse, a two-bucket hand wash with pH-neutral soap, and a rinse technique that avoids reintroducing contamination to the paint surface.
- Iron decontamination — iron fallout remover is applied to dissolve bonded ferrous particles that washing doesn't remove. These particles come from brake dust, industrial fallout, and road contamination. If left on the surface, they create micro-craters beneath the coating.
- Clay bar decontamination — a clay bar or clay substitute is used to physically pull bonded contamination from the paint that chemical decontamination didn't fully address. After this step, the paint surface should feel smooth to the touch with no rough texture.
- Paint correction — this is typically the most time-intensive step. Paint correction involves machine polishing to remove swirl marks, light scratches, oxidation, and surface imperfections. The goal is to restore paint clarity and gloss before the coating locks the surface condition in permanently. Correction may be single-stage or multi-stage depending on paint condition.
- IPA wipe-down — after correction, all polishing oils are removed from the surface using isopropyl alcohol solution. Polish residue left on the surface interferes with coating adhesion. This step ensures the paint surface is chemically clean and ready for bonding.
- Panel coating application — the ceramic coating is applied panel by panel using applicator blocks and microfiber cloths. Each panel is coated in a controlled pattern, then leveled before the coating begins to flash. Timing is critical—the coating must be leveled within a specific window depending on ambient temperature and humidity.
- Flash and inspection — after each panel is coated and leveled, it is inspected under specialized lighting to ensure even coverage with no high spots, streaks, or missed areas. High spots in dried ceramic coating are difficult to remove and require polishing to correct.
- Curing — the coated vehicle is moved to a controlled curing area. Depending on the product, initial curing may take 12 to 24 hours. During this period, the vehicle must not be exposed to water, moisture, or contaminants. Some professional coatings benefit from infrared heat curing to accelerate and strengthen the bond.
- Final inspection and customer delivery — after curing, the vehicle is inspected under lighting again before being returned to the customer. The installer walks through care instructions, the cure period requirements before the vehicle can be washed, and warranty documentation.
Why a Controlled Environment Matters
Ceramic coating application is highly sensitive to environmental conditions. Temperature affects how quickly the coating flashes on the surface—too hot and the coating begins to set before it can be properly leveled, creating high spots. Too cold and the coating doesn't bond effectively. Humidity introduces moisture that interferes with the chemical curing process.
Professional shops in the Highland, UT and American Fork area that do ceramic coating properly maintain temperature-controlled installation bays that isolate the vehicle from ambient dust, wind, and moisture during application. This level of environmental control isn't possible in a home garage or an open-air installation environment. It's one of the primary reasons professional results outlast DIY attempts using equivalent products.
What the Customer Can Expect After Pickup
Understanding what happens after you leave the shop helps protect the investment during the critical early curing period. Most professional ceramic coatings have an initial cure period of 7 to 14 days during which the coating is reaching its full hardness and chemical stability. During this period, vehicle owners should follow specific care guidelines.
Recommended care during the post-installation cure period includes the following:
- Avoid washing the vehicle for the first 7 days minimum — water exposure before full cure can introduce water spots that get locked into the coating surface
- Keep the vehicle out of rain if possible during the first 48 to 72 hours — direct water exposure immediately after application is particularly problematic
- Avoid automatic car washes with brushes permanently — brush contact can cause micro-scratches that damage both the coating and the paint beneath
- Use pH-neutral soap for all hand washing going forward — acidic or alkaline cleaners degrade coating chemistry over time
- Schedule a follow-up inspection at 6 to 12 months — professional shops can assess coating performance and perform any maintenance topping as needed
Frequently Asked Questions
How long does a professional ceramic coating installation take from drop-off to pickup?
A professional installation on a well-maintained vehicle typically takes one to two days. Vehicles requiring significant paint correction may take two to three days or more. Rushed installations that promise same-day coating are almost certainly skipping preparation steps that directly affect how long the coating lasts and how well it bonds.
Can ceramic coating be applied to a vehicle that already has a wax or sealant on it?
No. Wax and paint sealants must be fully removed before ceramic coating application. These products create a barrier between the coating and the paint surface that prevents proper molecular bonding. The decontamination and IPA wipe steps in a professional process are specifically designed to remove these residues.
Does ceramic coating protect against scratches from car wash brushes?
Ceramic coating adds hardness to the paint surface, which provides some resistance to light scratching. However, it does not make paint immune to swirl marks from abrasive brushes. Automatic car washes with rotating brushes can still introduce swirl marks on coated paint. Hand washing with the two-bucket method is always recommended for coated vehicles.
What is the difference between a 1-year coating and a 5-year coating?
Coating durability is determined by the SiO2 or silicon carbide concentration, the number of layers applied, and the quality of surface preparation. Entry-level single-layer coatings may carry 1 to 2-year ratings. Professional multi-layer products like Opti-Coat Pro, which is used at Veteran Detail, carry longer durability ratings backed by manufacturer warranties. The warranty period reflects the coating's expected bonding and performance lifespan under normal conditions.
What happens if the coating develops a defect after installation?
Reputable shops stand behind their installations. If a defect appears that is attributable to the installation process rather than customer-caused damage, a professional installer should address it under warranty. This is another reason to choose an established shop with documented warranty terms rather than a budget alternative with no accountability.
Conclusion
A professional ceramic coating installation is a multi-stage, chemistry-driven process that looks nothing like a basic detail or a consumer kit application. The preparation steps are what separate a coating that lasts a decade from one that fails in 18 months—and each step serves a specific purpose in ensuring the coating bonds, cures, and performs at its rated level. When you understand the process, the price makes sense: you're paying for expertise, time, controlled conditions, and professional-grade products that can't be replicated in a driveway. Veteran Detail follows this full process on every coating job at our American Fork, UT facility. If you're ready to protect your vehicle's paint the right way, reach out and we'll walk you through what your vehicle needs.